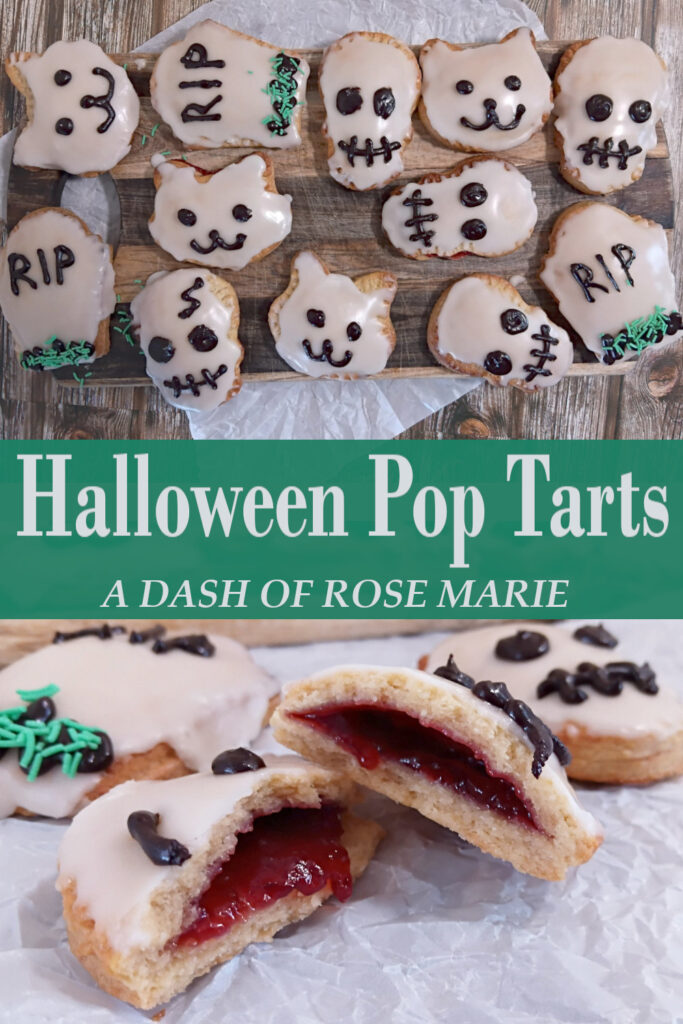
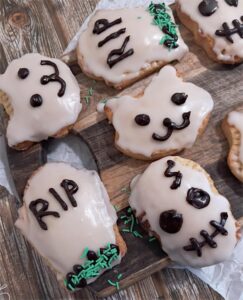
Jam Filled Halloween Pop Tarts
These chunky little pop tarts are such a fun thing make at home this spooky season. Gather up your Halloween themed cookie cutters and your rolling pin and you will be baking up cute, sweet treats in no time at all.
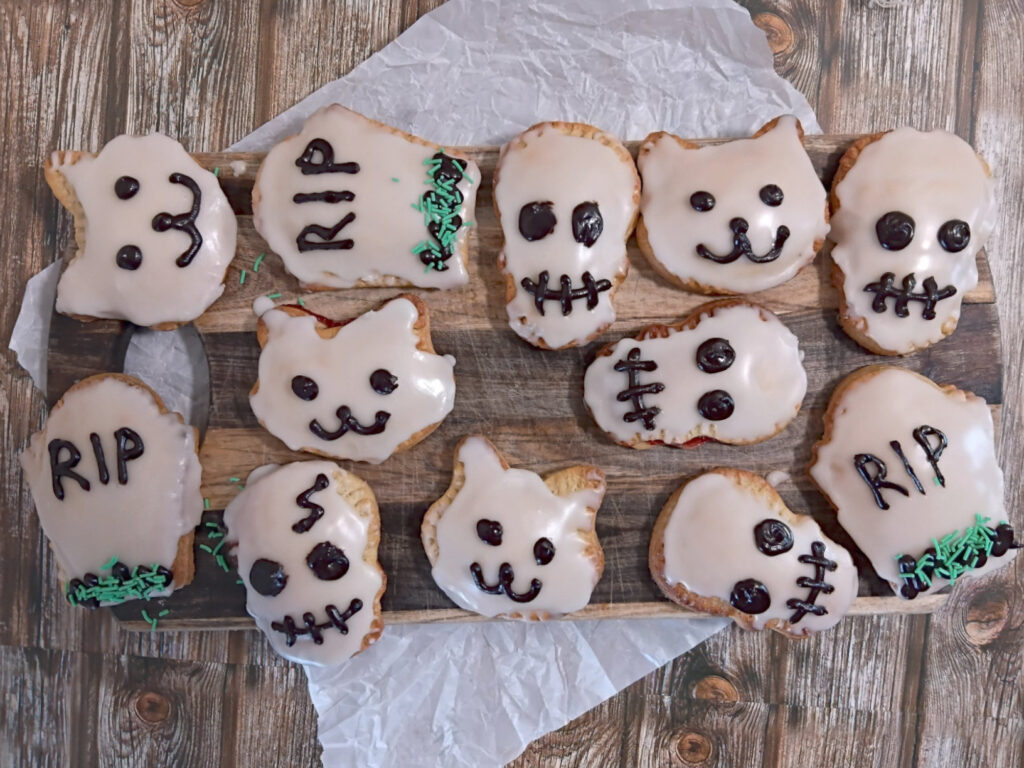
These spooky Halloween pastries are flaky and sweet, packed with jam and are super adorable. Use cookie cutters and a homemade pastry to make and decorate your own Halloween pop tarts any way you like!
Choose your own pop tarts shapes
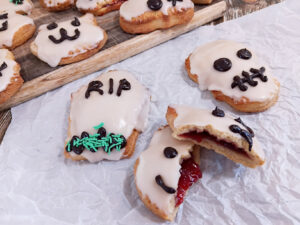
I have made mine as skulls, cats and tombstones. These will also be adorable as ghosts, pumpkins or witches hats.
You could even make these to match other themes like
– Hearts for valentines day,
– Trees for Christmas
– Bunnies or eggs for easter
You can even just keep them simple with circles, squares or the classic rectangles.
When picking your cookie cutters you do need to keep the filling in mind. You want to use cookie cutters where there is a big enough center “pocket” for the filling to sit while still allowing about one cm around that for sealing the dough together. For example a round shape like a skull will work better than a long narrow shape like a bat.

Ingredients
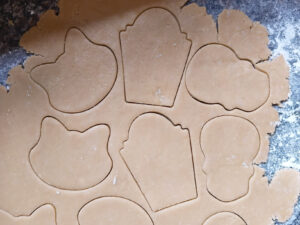
Dough cutouts
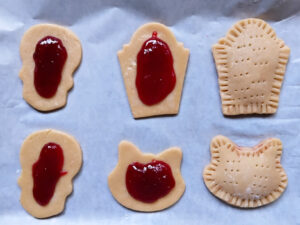
Filling and preparing your po tarts
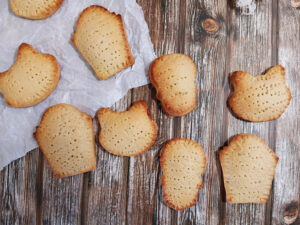
Baked and ready for frosting
Fillings and toppings
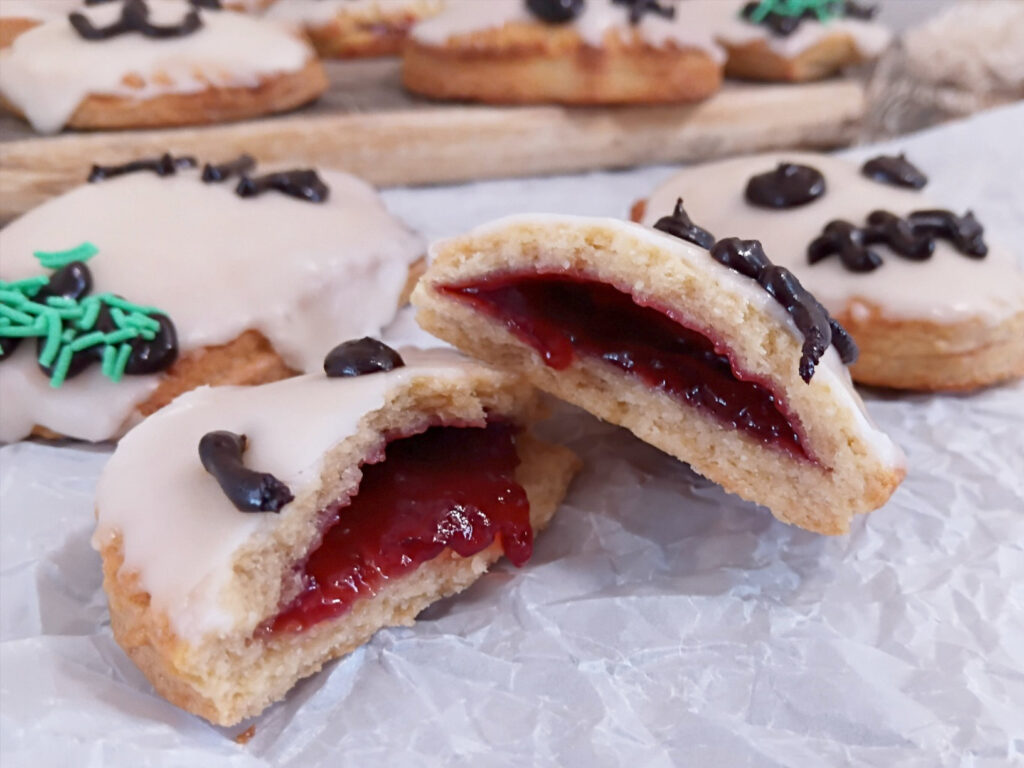
I have filled mine with a plum jam and have done a vanilla and chocolate topping. But you can fill and top these any way you like!
Add some color to your pop tarts by tinting your glaze and frosting, or sprinkling over colored/themed sprinkles.
Here are some filling ideas
– Any flavour or jam. Red berries are great for a spooky blood look or a little bit of apricot jam coloured green for some ghostly ectoplasm inside of a ghost pop tart.
– Cinnamon sugar filling. Mix together softened butter, brown sugar and cinnamon to form a thick paste.
– Chocolate. Fill with hazelnut spread or make a thick chocolate ganache with cream and chocolate to fill your pop tarts.
Tips and tricks for perfect Halloween pop tarts
- Make sure that your butter and cream and cream are very cold. The cold butter will form little pockets in the dough as it cooks. This will give your pop tarts that flaky pastry texture that makes these so good.
- If you don’t have a large food processor you can still make these! Instead of dicing your cold butter you will want to grate it. Place your flour and butter into a large bowl. Rub the butter into the flour until the mixture resembles breadcrumbs. Mix through your sugar and salt before adding the cream and vanilla. Mix well until you can form the dough into a smooth ball. Follow the remaining steps to make your pop tarts.
- When rolling out your dough, you will want it to be slightly less than one cm thick. If you find that some of your cut outs are thicker than others you can always roll them out a little more and re-cut them as needed.
- Make sure that you pierce the top cutouts with a fork before you place the two sides together. This helps avoid putting any pressure on the jam center. If you forget to do this then you can pierce the dough 2-3 times with the point of a sharp knife.

Jam Filled Halloween Pop Tarts
Ingredients
Method
- Place your flour, sugar, salt and diced butter into a large food processor. Pulse the mixture until the butter pieces are very small and the mixture resembles breadcrumbs.
- Add the vanilla and a splash of cream. Pulse the mixture to incorporate it through your dough. Gradually add in more of the cream, pulsing between each addition.
- Once all of the cream has been added, continue to pulse until you have a rough dough that resembles a dry cookie dough. Remove the dough from your food processor and place it onto a clean bench top.
- Use your hands to bring the dough together and form it into a smooth ball.
- Preheat your oven to 170 degrees Celsius, fan bake and line two oven trays with baking paper.
- Dust your work surface, rolling pin and dough with icing sugar.
- Roll out your dough, you will want it to be just less than 1 cm thick.
- Use Halloween cookie cutters to cut out your pastry shapes. If you are using multiple shapes, like I have here, make sure that you are cutting them out in pairs. Then keep the shapes in two separate piles for tops and bottoms.
- Place half of your cutouts onto your lined baking trays, leaving a good amount of space between each pop tart (just in case any of them burst when they are cooking).
- Prepare your tops and bottoms next. Brush the bottom pieces with a little bit of warm water and pierce the top pieces with a fork a few times each.
- Place a heaped teaspoon of jam into the very center of each of your bottom pop tart halves. Spread it slightly but make sure that you leave a generous edge for the pastry to stick together.
- Gently place your top piece on top of your pop tart base, one at a time. Carefully use your fingers to press around the outsides of the dough to seal it together. Use a fork to crimp all of the edges of your pop tarts.
- Brush the tops with a little bit of extra cream or milk.
- Bake in your preheated oven for 18 minutes or until they are lightly golden on the edges and baked through.
- Place your icing sugar into a small bowl with your vanilla. Add in the milk a little at a time, mixing constantly until the mixture is a spreadable consistency.
- Take your cooked pop tarts (still warm) and dip the top surface into your frosting. Use the back or a spoon to spread your frosting over the tops, removing any excess as you go. Set aside to set for a few minutes.
- Sieve and mix the cocoa powder into your remaining glaze (if you have run out you can make a small batch with just 1/4 cup icing sugar and some milk). Add some black food coloring to darken the mixture if you like.
- You want your mixture to be thick enough to pipe decorations onto your pop tarts. If it is too thick add a little milk and if it is too thin add more icing sugar.
- Place the chocolate frosting into a small piping bag or a snap-lock bag. Use this to decorate your pop tarts.
Notes
Thank you so much for taking the time to read through my jam filled Halloween pop tarts recipe. I hope you enjoy trying this out for yourself. Please feel free to add any questions or comments below. I am happy to help out wherever possible and I would love to hear how this recipe worked out for you.